Helpful ProPools resources:
- CaliMar Above-Ground Pool Information & Installation Tips
- More CaliMar Above-Ground Pool Tips
- Above-Ground Pools
- Above-Ground Pool Accessories
Section 1: Above-Ground Pool Maintenance (During the Swim Season)
The 4 pillars (do these consistently, and the pool stays easy)
- Circulation: Run the pump long enough for regular turnover (many owners land around 8–12 hours/day in peak summer; more if it’s very hot, heavily used, or you’re clearing cloudy water). Aim for steady surface movement which you can see so the skimmer can do its job.
- Filtration: Your filter is your “dirt storage.” If it’s clogged, water clarity suffers even when chemistry is perfect. Watch the pressure gauge and clean when it rises about 8–10 PSI from its clean baseline.
- Water chemistry: Keep sanitizer and pH in a healthy range so chlorine can work effectively and swimmers stay comfortable. Test often enough that you’re adjusting small problems—not fixing big ones.
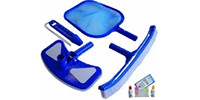
- Physical cleaning: Brushing and vacuuming prevent algae from getting a foothold and keep fine debris from staying suspended.
A simple maintenance rhythm that works
Every day (or every time you swim)
- Skim leaves/bugs.
- Empty baskets (skimmer basket + pump basket).
- Quick visual: waterline, return flow, and the filter pressure gauge.
2–4 times per week
- Test and adjust sanitizer and pH.
- Brush walls and floor (especially seams, steps, behind ladders). Though you can also move that to Weekly if the walls and floor are mostly clean and not-slimy.
Weekly
- Vacuum (manual or automatic).
- Shock/oxidize as needed (common triggers: heavy bather load, storms, early algae, “chlorine smell,” or cloudy water).
- Clean the waterline (sunscreen and oils build up here).
- Deep-clean filter media (cartridge rinse/soak, sand backwash schedule review).
Monthly (or as needed)
- Inspect clamps, hoses, unions, ladder hardware, return fitting(s), and skimmer faceplate screws.
Target water ranges (practical homeowner guidance)
- pH: keep it in the 7.0–7.8 band for comfort and sanitizer performance. If the pH is out of balance, that's what makes your eyes burn, not the chlorine. (Unless the chlorine is crazy high)
- Chlorine: keep a reliable free chlorine level in the water at all times (follow your sanitizer product/system instructions).
Filter cleaning: what “normal” looks like
Sand filter (multiport valve)
- As debris accumulates, pressure rises and return flow slows.
- Backwash when your pressure gauge rises meaningfully above your recorded “clean” pressure (many manufacturers cite a threshold around 8–10 PSI above clean pressure).
- Only move multiport settings with the pump OFF.
Cartridge filter
- Clean cartridges when pressure is about 10 PSI above the starting pressure (common manufacturer guideline).
- Rinse thoroughly with a garden hose; occasionally soak in something like Trisodium phosphate (TSP) if oils/minerals build up.
- Before opening any pressurized filter tank, shut off power and relieve pressure per the manufacturer instructions.
Quick troubleshooting (fast diagnostics)
-
Cloudy water: Often filtration time, a dirty filter, or sanitizer/pH out of range. Clean filter, brush, verify chemistry, and run the pump longer until clear. Multiple filter cleanings within days of each other may be necessary to get the water clear.
-
Green/algae starting: Brush aggressively, raise sanitizer per product label, keep the pump running, and clean the filter more frequently until clear. Then shock pool and add an 80% Active Ingredient Algaecide.
-
“Chlorine smell” / irritation: Often tied to combined chloramines and/or pH issues. Test, balance pH, and oxidize/shock as needed.
-
Rising pressure / weak returns: Clean/backwash filter; empty baskets; confirm valves are open and hoses aren’t kinked.
Section 2: Spring Start-Up (Opening Your Above-Ground Pool)
Spring start-up is easiest when you do it in the right order: clean first, then circulate, then balance water.
Step-by-step opening checklist
1) Remove cover and clean up the “winter mess”
- Pump off standing water on the cover (if applicable), remove debris, then take the cover off.
- Clean and dry the cover before storage to extend its life and make next spring easier.
2) Reinstall and inspect the pool “plumbing loop”
- Reconnect skimmer/return fittings, pump, and filter connections.
- Inspect O-rings and gaskets; replace anything cracked or flattened.
- Confirm clamps are snug, hoses are sound, and valves operate smoothly.
3) Fill to operating level
- Fill water to mid-skimmer (or manufacturer-recommended level).
- Prime the pump (if needed) and confirm steady return flow.
4) Start filtration and circulate continuously at first
- Run the pump continuously for the first day (or two) while you clear and balance water.
- Brush the walls and floor to knock loose fine debris and early algae film.
5) Test and balance in the right sequence
- Get sanitizer in the water first (so you’re not “balancing a swamp”).
- Total alkalinity (helps reduce pH swings).
- pH.
- If used, stabilizer / CYA per product instructions.
6) Clean the filter early—and expect to do it more than once
- Spring water often carries a heavy initial dirt load.
- Watch the pressure gauge and clean/backwash sooner than you would mid-season.
7) Final polish (the “looks great” step)
- Vacuum settled debris.
- Brush again.
- Set your normal in-season schedule (pump run time + testing cadence).