
How to Perfectly Level the Ground for Your CaliMar Above-Ground Pool: A Step-by-Step Guide
Author: Brian Lane
Preface: This is generally a step-by-step guide for installing a CaliMar above ground pool, yet may not cover some specific details as this covers most of the "General Rules of Installation". Individual installations are all unique but most do follow these general step-by-steps below.
Hey, pool enthusiasts! It's
your friends at ProPools.com here— we've seen thousands of backyard transformations with our premium CaliMar above-ground pools (think Coronado, Chesapeake, Tahoe, and the rest of the gang). These pools are tough as nails with their resin components and galvanized steel walls, but even the best pool won't shine if the ground underneath isn't dead-level. Get this step wrong, and you risk wrinkles in the liner, stress on the walls, or (worst case) an uneven water line that drives you nuts every swim.
The golden rule? **Your site must be within 1 inch of perfect level across the entire pool diameter.** Not "close enough"—perfect. Out by more than that, and the higher side bears extra pressure, which can shorten your pool's life. The good news: You can absolutely DIY this with a free weekend, some elbow grease, and the right tools. We've compiled this detailed guide from the official CaliMar instructions, our install videos, and feedback from happy customers who've nailed it.
Tools You'll Need:
- Rotational laser level or transit (rent one—worth every penny for accuracy)
- Long straight 2x4 board (at least 8-10 ft) and a 4-ft carpenter's level
- Shovel, rake, and sod cutter (rental for big jobs)
- Lawn tamper or plate compactor
- Stakes, string, and a tape measure
- Mason's sand (Sand Needed Chart)
- Optional but awesome: Gorilla Pad or Armor Shield liner protector
Step 1: Choose and Mark Your Spot
Pick a sunny, well-draining area at least 3-4 feet larger all around than your pool's diameter. Call 811 to mark utilities first! Stake out the exact pool circle (or oval) using the center point method: Drive a stake in the center, tie a string half the pool's diameter plus 2 feet, and walk a perfect circle while
spraying paint.
Step 2: Clear the Area
Remove all grass, sod, roots, rocks, and debris inside (and a bit outside) your marked circle. A sod cutter makes this fast and gives you nice rolls you can reuse elsewhere in the yard. Get down to bare soil—no shortcuts here, or things will grow up and poke your liner later.
Step 3: Find the Lowest Point (This Is Crucial!)
Set up your laser level or transit in the center. Rotate it 360° and mark the ground every few feet where the beam hits—this shows your high and low spots. The absolute lowest spot on your site is now your "benchmark."
**Everything else gets dug down to match this low point.** Never, ever fill low areas with dirt or sand to bring them up—fill settles under 20,000+ gallons of water and can wreck your pool.
Step 4: Dig Out the High Spots
Start shoveling or scooping away soil from the high areas until they're level with your benchmark. Work in passes—remove a little all over rather than digging deep holes in one spot. Check constantly with your long 2x4 "leveling board": Lay the straight 2x4 on the ground with the
carpenter's level on top, rotating it like a giant compass from the center stake. The bubble must stay centered everywhere.
Pro Tip from our customers: This step takes the longest (sometimes a full day for a 24 ft pool), but rushing it leads to callbacks. If your yard has a gentle slope, you might remove 6-12 inches on the high side. Save the good topsoil for garden beds!
Step 5: Fine-Tune and Check for Perfect Level
Rake the entire area smooth. Tamp the soil firmly—rent a plate compactor if possible; walking over it with a hand tamper works too. Recheck with the laser or long board. You're aiming for no more than 1 inch variance from the lowest to highest point anywhere under the pool. For ovals, pay extra attention along the straight sides.
Assemble the pool bottom frame and walls. It is recommended to also add
the top inner stabilizer rails to keep the wall from falling over.
Step 6: Add Your Base Material
Once the dirt is level and compacted:
- Spread 2 inches of clean sifted masonry sand over the entire floor area.
- Rake it smooth, then tamp again. This creates a cushy, footprint-free base for your liner.
- We highly recommend laying down a liner pad like the HII/CaliMar Premium Liner Protector and Cove Kit, Gorilla Pad or Armor Shield next—it blocks roots and rocks forever.
Step 7: Build the Cove (Don't Skip This!)
Once the pool walls are erected, around the inside edge where wall meets floor, inside the pool, form a 6-8 inch high, 45-degree "cove" using extra sand (or handy peel-and-stick foam cove strips). 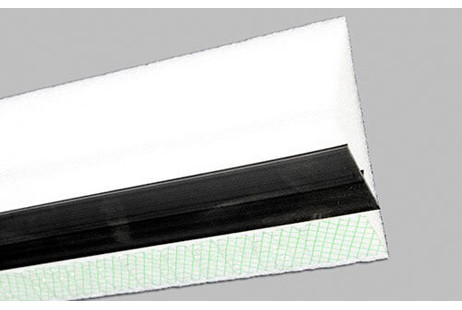 This gentle slope keeps the liner from stretching under water weight and prevents those annoying heel dents when people walk the perimeter.
This gentle slope keeps the liner from stretching under water weight and prevents those annoying heel dents when people walk the perimeter.
Final Checks Before Completing Assembly
Walk the site one last time with your leveling board. Wet the sand lightly and tamp again if needed—it should feel rock-solid. If everything's within 1 inch (most pros shoot for ½ inch), You're Golden!
There you go—that's the no-BS way to level and prepare the ground for a CaliMar pool that'll last decades. We've watched families tackle this themselves and end up with installs better than some pros. Still nervous? Watch the official CaliMar install videos on your pool's product page at propools.com
(under the Resources tab), or give us a call—we love walking customers through it.
Ready for splashdown? Grab your CaliMar pool package today and let's turn that perfectly level spot into summer memories. You've got this!
- CaliMar Round Installation Video
- CaliMar Oval Installation Video