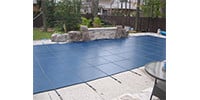
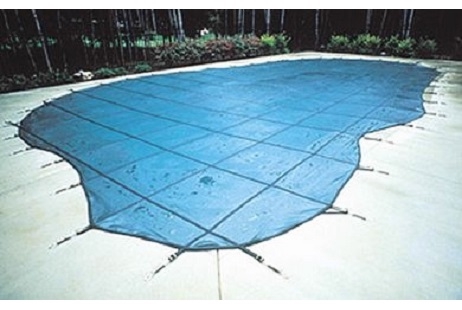
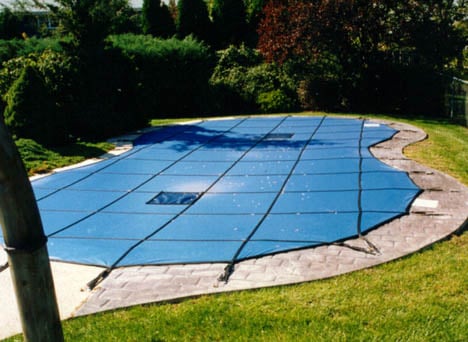
A winter safety cover is a high-tension, load-rated system (cover fabric + straps + springs + anchors). Treat it like safety equipment, not just a “tarp.” Removing it correctly helps prevent ripped straps, bent springs, damaged anchors, and premature wear—plus it keeps your deck safer once the anchors are recessed.
This guide applies to most inground safety covers sold on ProPools.com (mesh and solid safety covers). If your cover is damaged (tears, broken straps, failed stitching), it should be considered not safe until repaired (if possible) or replaced.
Before You Start (10 minutes that prevents 2 hours of frustration)
Pick the right day
- Choose a dry day with no ice/snow on the cover.
- Avoid windy conditions (wind turns a big cover into a sail).
Grab your basic tools
- Safety cover installation/removal tool (“cover rod”)
- Leaf blower or soft broom
- Garden hose with spray nozzle
- Mild soap + soft brush (nylon bristles)
- A clean tarp (to fold on) or a clean section of deck (Not Grass)
- Storage bag (typically came with the cover) and a place to hang it
- Hex key / anchor tool (for lowering anchors flush with the deck)
- Gloves (recommended)
If it’s a SOLID safety cover
- Remove standing water first (use a cover pump if needed).
- Clear leaves/twigs so you don’t drag grit across the fabric while folding.
Do a quick safety scan
- Keep kids/pets out of the work area.
- Don’t step or jump on the cover—treat it like safety gear, not a trampoline.
- Look for damage (rips, broken straps, loose stitching). If you find major damage, plan for repair before reinstalling next season.
Step 1: Remove Debris Without Creating a Mess
- Blow or sweep leaves and loose debris off the cover.
- Rinse dirt/pollen lightly with a hose.
- Push remaining debris toward an edge so it comes off the cover instead of falling into the pool.
Tip: If debris is wet and heavy, remove a little at a time. Trying to “one-pass” it often dumps debris into the pool.
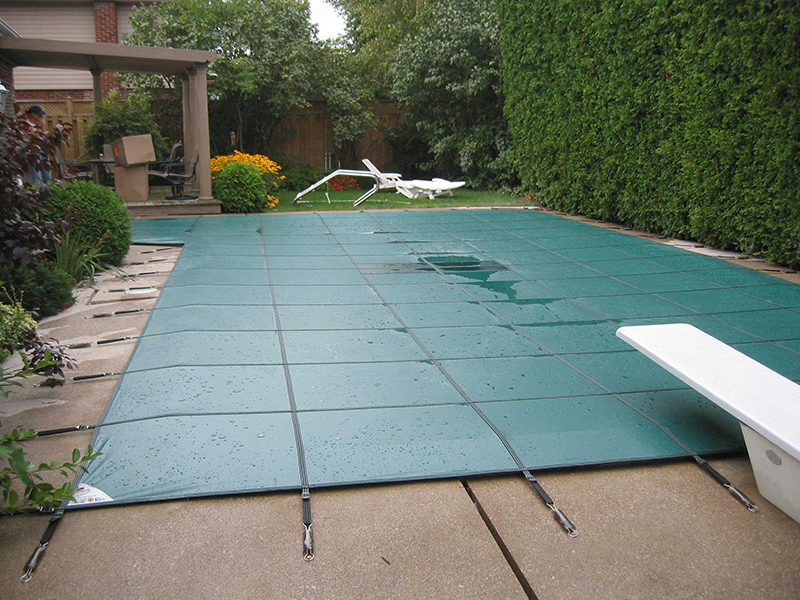
Step 2: Release Tension and Remove the Springs (Correctly)
Safety covers are held tight by springs connected to deck anchors. Your goal is to remove springs without scraping the cover over raised anchors.
- Start at one corner and work methodically around the pool.
- Use the installation tool to unseat the spring from the anchor while keeping control of the tension.
- As you remove springs, begin folding the cover inward so it stays organized.
Best practice: Remove springs along one long side first, then the opposite side, keeping the cover controlled and folded as you go.
Avoid this common mistake: Don’t drag the cover across the deck over raised anchors or sharp edges.
Step 3: Fold as You Go (Accordion Method = Easier Storage)
As the springs come off, fold the cover in an “accordion” pattern:
- Fold a 2–3 ft section over onto itself
- Keep straps aligned and not twisted
- Continue folding toward the center
Once fully off the pool, unfold the cover, give it one more cleaning, let it dry, then re-roll in accordion fashion, then roll it into a tight bundle that fits your storage bag.
Pro tip: Folding on a clean tarp keeps the underside clean and reduces abrasion from gritty concrete.
Step 4: Lower Anchors Flush With the Deck (Don’t Skip This)
When the cover is off, screw the anchors down into their sleeves so they sit flush with (or below) the deck surface. This helps prevent stubbed toes, trip hazards, and accidental damage to anchors during the swim season.
Optional but smart:
- If you’ve had sticking anchors in the past, flush out anchor sleeves with a garden hose
- Recess each anchor as you remove a spring to avoid any possible snags
Clean the Cover (Mesh vs Solid)
Mesh safety covers
- Rinse with a garden hose.
- If pollen/fine debris is embedded, rinse from the underside to push debris back out.
- If you use a pressure washer, use only low pressure (high pressure can damage material and stitching).
Solid safety covers
- Rinse the top surface thoroughly.
- Use mild soap and a soft brush for oily residue or grime.
- Pay attention to seams and straps—rinse well so soap doesn’t sit in stitching.
General cleaning rules (both types)
- Use a soft/nylon bristle brush, not wire or abrasive brushes.
- Rinse thoroughly so no cleaner residue remains.
- If pool chemicals contact the cover during opening, rinse immediately with plenty of water.
Step 6: Drying and Storage (Avoid Mildew, Heat Damage, and Rodents)
- Put the cover into its storage bag.
- Hang the bag off the floor (hook, wall rack, sturdy shelf). Hanging allows drainage and helps protect from rodents.
- Once the cover is dry, consider storing the cover (in the bag) in something like an extra large storage tote to help protect from rodents.
- Store in a cool, shaded, dry location.
- Keep it away from pool chemicals, heat sources, and sharp objects.
Springs on or off? Some owners remove and bag the springs; others store them attached. Either can work—what matters is keeping components organized and protected.
End-of-Season Inspection Checklist (5 minutes now saves money later)
- Check straps for fraying or cuts
- Inspect stitching and webbing
- Look for fabric abrasion spots (especially near coping edges)
- Count springs and note any that are bent, rusted, or weak
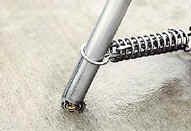
- If one of the spring ends is "egg shaped", that is an indication of too much tension and the spring should be replaced.
- Just in case you see an "egg shaped" spring end, the proper position for a spring when attached to a deck anchor, is half compression. Not all the way compressed.
- Confirm your storage bag is intact
If anything looks questionable, plan repairs in the off-season—don’t wait until closing time when you’re racing the weather.
Quick “Do / Don’t” Summary
Do
- Do - Remove water first on solid covers
- Do - Fold as you go (accordion method)
- Do - Lower anchors flush with the deck
- Do - Rinse methodically, gently and thoroughly
- Do - Store in the bag, hung off the ground, away from heat/chemicals
Don’t
- Don't Drag the cover across raised anchors or sharp deck edges. (Lower anchors as you remove each spring)
- Don't Use low high-pressure washer tips
- Don't Store on the floor (rodent risk)
- Don't Leave anchors raised all summer
Safety Covers Sold on ProPools.com
To shop mesh and solid inground safety covers: https://www.propools.com/subcategory/inground-safety-pool-covers/275