ProPools.com
Hours:  Mon. - Fri.  (7am - 5pm CST)  Sat. - (8am - 4pm CST)
(888) 352-7582
Home Inground & On Ground Pool Construction Process - The Dig

Inground & On Ground Pool Construction Process - The Dig

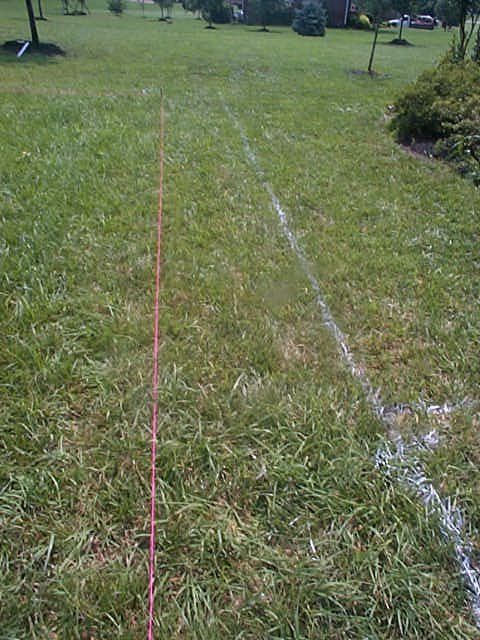
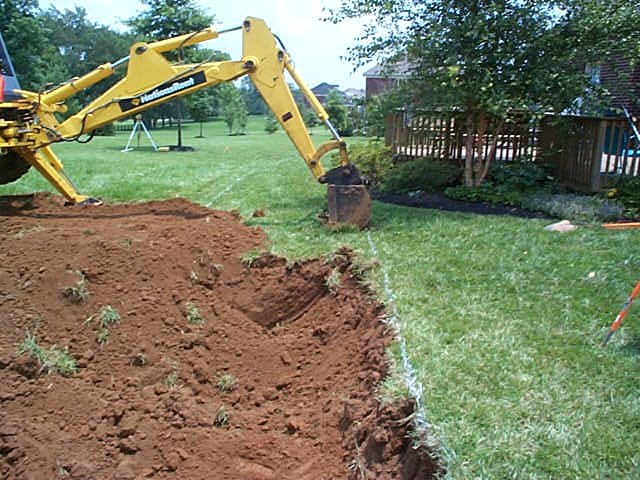
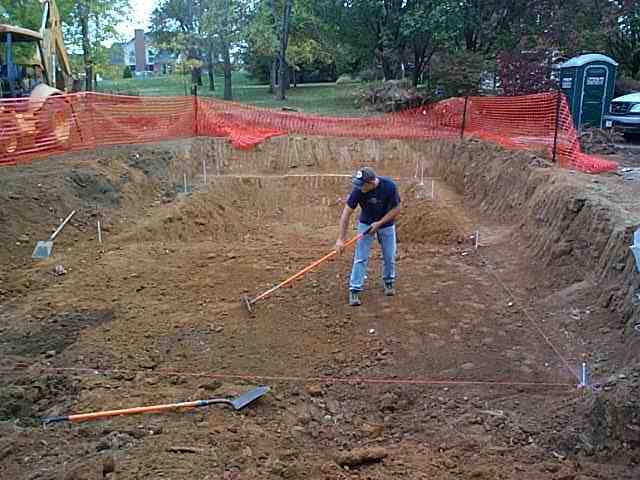
The Dig(excavation) is perhaps the most important part of your pool construction. Having the dig as close to exact is vitally important. Having both the proper dig specifications done and the cross dimensions play a vital role in just how easy the wall assembly will go. If you have to err in any one direction the best would be to under dig rather than over dig. Taking a little dirt out by hand is easier than putting material back and then being certain the wall is sitting on good solid ground. The walls should sit on "undisturbed" earth.


OnGround Pools Construction Picture
1
Prior to making the first dig mark in the yard, the pool should be outlined with marker paint.
The marker paint should identify the over dig. Then a string is pulled to show the actual location of the pool walls.


OnGround Pools Construction Picture
2
Using the markings on the ground it is possible for the excavator to know where to dig. Once the dig starts for the depths of the pool it is crucial that someone be using a transit level to be certain the dig is being done to the proper depths.


OnGround Pools Construction Picture
3
Having the hole size dug to the dig specifications helps the job go a lot smoother. Looking toward the deep end of the pool (before the hopper is dug) We regularly check the depth we're digging with a laser level. If a laser level is not available you can also use a standard site level.


OnGround Pools Construction Picture
4
Notice the relatively clean edges around he excevation site. And the hopper which is in the foreground of the picture has space to walk around it for wall assembly and post wall assembly installation of plumbing, electrical, etc.


OnGround Pools Construction Picture
5
This pool is dug to the dimensions specified on our dig specification sheet. The re-bar has been painted white for visual purposes with each piece of rebar is positioned at key measurement points within the pool. The strings around the pool represent the finished height of the pool bottom. Notice the extra one to two feet of space behind each of the re-bar stakes. As you'll see later this gives room for assembling the walls, installing the pipe, pouring the footer, etc.


OnGround Pools Construction Picture
6
Once, the big dig is completed, you may have to smooth down or remove any high spots that may still remain.


OnGround Pools Construction Picture
7
Just one more picture showing the dimensional changes in the pool bottom. The stakes represents key points. We use smaller stakes while putting in the pool bottom. These smaller stakes have strings attached to them which are marked 2 inches above the bottom of the pool wall. Then we place a nylon string at the point and stretch it to the other stakes across the pool. This will assist us in getting the proper finished depth of the pool and assure the bottom to be consistent.


OnGround Pools Construction Picture
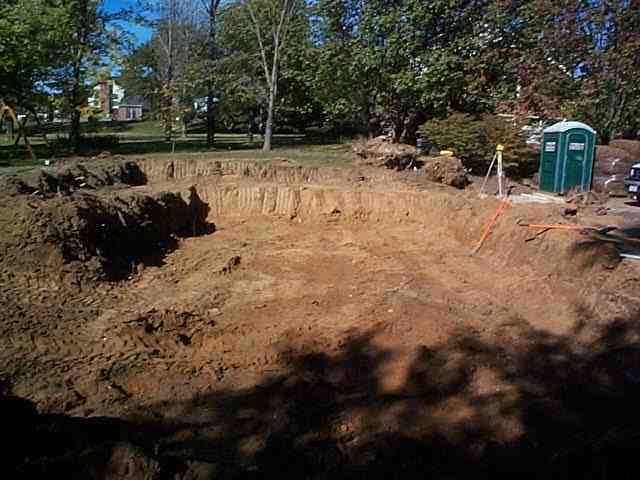
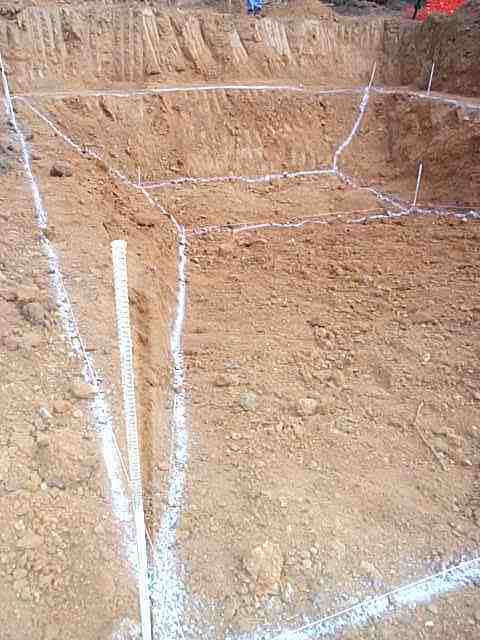
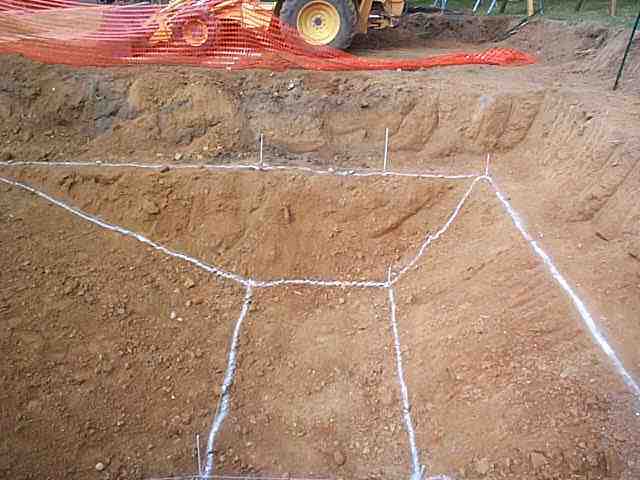
8
This pool has been completely dug and we have installed marks on the ground to help customers be able to see the grade changes in the swimming pool. These grade changes should be virtually identical to customer approved dig specification sheet, which come with every in ground pool we sell. The White line in the nearest part of the foreground is the break or beginning of the slope. The rectangle in the bottom of the pool is the hopper. The lines running at an angle out of the hopper denote changes in pitch and elevation. The top line which goes around the top of the hopper represents the exact position where the wall will be sitting.


OnGround Pools Construction Picture
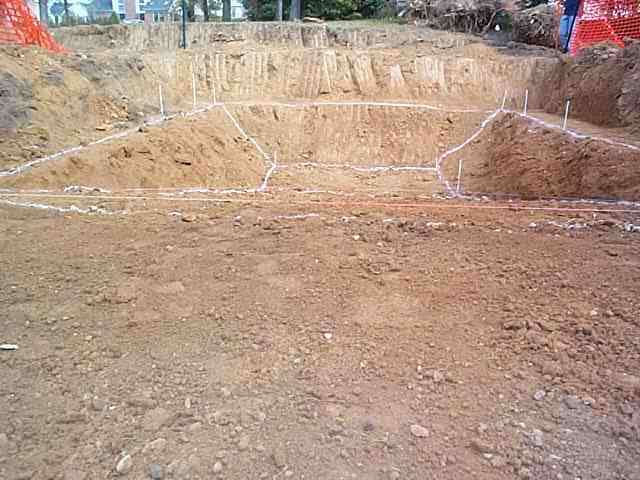
9
Standing on the Deep End Side of the pool looking at the hopper. Paint is used for visualization.


On Ground Pool Construction
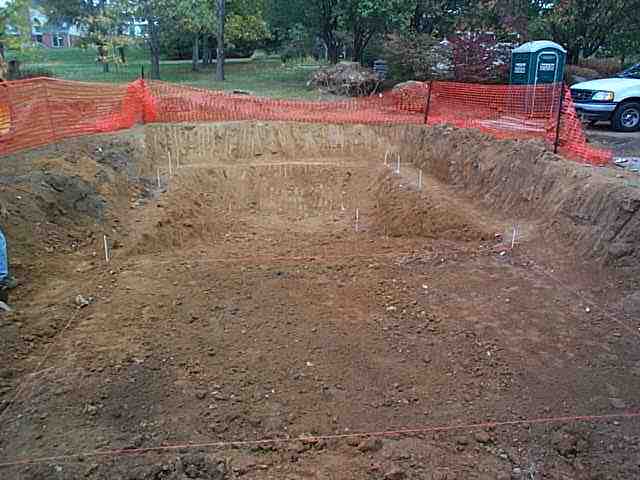
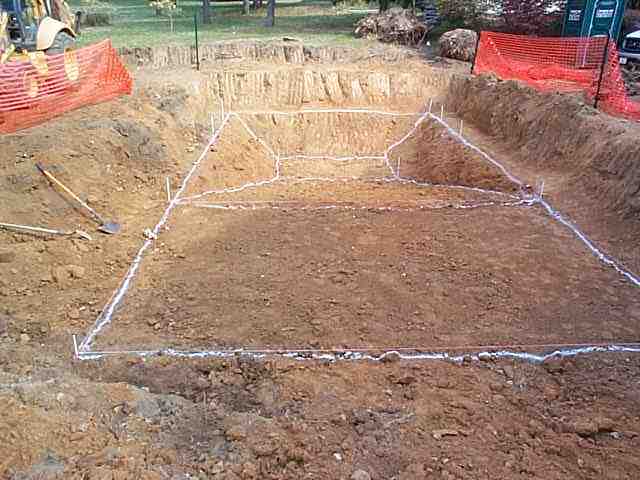
10
This is a good clean over all picture of the pool. The outside white lines represent where the pool walls will be sitting. (Not withstanding leveling and squaring) Notice down the sides and across the back of the pool there is approximately a 2' walkway. This will allow enough space for the concrete footer which gets poured behind the pool walls at approximately 4-6 inches deep. The concrete footer will next have gravel placed on top of it the following day. Then the plumbing can be placed around the perimeter of the pool and have plenty of room to work. Notice for added safety we keep an orange safety fence around our job sites so no one will accidentally fall into the hole. It is open in the image in order for us to work but when ever we leave the job we are certain that the security fence goes around the perimeter of the work area or at least the pool hole.


Copyright © 2024 ProPools.com. All rights reserved.